Notes and Details on Making the A-frame Platter
|
This platter represents an exploration that I have not attemped before. Here I have concentrated the edges of several planks to produce a platter from a perspective that is not natural. On the one hand this platter represents my on going exploration of mixing wood and clear epoxy and on the other a testing of what the epoxy will allow me to do.
Let me explain how I got to the point where the video picks up the story: When I had the pieces from the A-frame sawn at the mill, I had them cut at 1 1/2" thick. This is the regular depth that I use. When I got the wood back to the studio, I ripped 3" off of the edges of several of the planks. I wasn't sure exactly what I was going to do but I was sure that this would give me enough depth to make a shallow bowl or a platter. I took the edge pieces and cut them into 18" lengths. I separated the highly textured pieces from those with less character. I made two molds, each about 18" square, lined them with plastic and set the pieces in them, on edge, with the textured side up. I put all of the highly textured pieces in one mold and the less textured pieces in the second mold. I then started adding pours of epoxy over a period of several weeks. These videos offer some insights to the thought process I went through to produce the blank. The third video - the path not taken - is the thinking behind one idea which I decided not to use. The image below is the resulting blank from this process. For further videos on turning wood and epoxy blanks please visit this page. 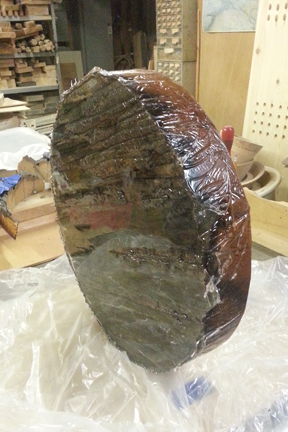
|
Return to the A-frame story |
